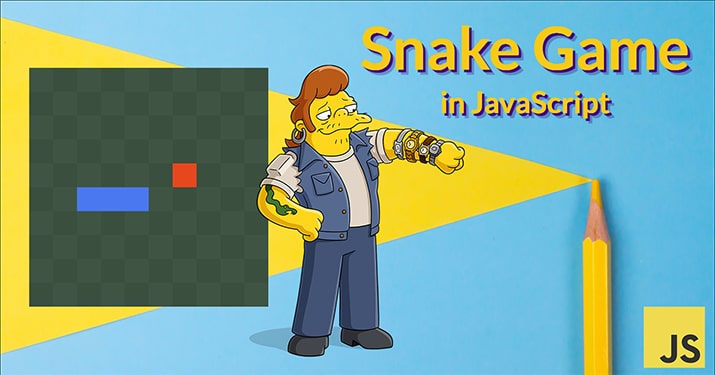
The Snake Game is a classic and simple arcade game that caught on in the early days of mobile phones and personal computers. In this game, players control a snake that moves around a bordered field, collecting food. As the snake consumes food, it grows longer, intensifying the gameplay. The objective is to navigate the snake without colliding with the walls or its own body. With its straightforward mechanics, the Snake Game remains an enduring and enjoyable experience for players spanning all age groups.
In this tutorial, I’ll guide you through my interpretation and further implementation of a simple version of Snake in JavaScript using HTML5 Canvas. By the end of the post, you will have learned how to draw elements on Canvas, manipulate object states, handle events, and manage loop intervals in JavaScript.
If you’re eager to see the game in action, check out the complete code on my GitHub repository Snake Game in JavaScript.
Getting StartedBefore we dive into coding the game, let’s outline the key components and functionality we need to implement:
- Game Board:
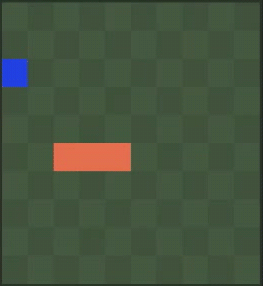
- The game board is represented as a grid with cells.
- Cell Coloring:
- Color the cells of the game board in a chessboard pattern.
- Snake Object and Movement:
- Add the Snake object and implement its movement within the game board.
- Changing Snake Movement Direction:
- Allow the player to change the snake’s movement direction using keyboard input.
- Food Object Generation:
- Generate food objects randomly within the game board.
- Snake Size Increment:
- Increase the size of the snake when it collides with a food object.
- Score Display:
- Display the player's score whenever the snake consumes food.
- Game Over Conditions:
- The snake collides with its own body.
- The Snake hits elements beyond the defined game board range.
Since the requirements are defined, we can create the project files and start coding the Snake game.
Setting Up the Folder StructureThe project consists of three essential files: index.html, style.css and game.js. Each file serves a specific purpose in creating the game.
To adjust the folder structure for the game, start by creating a new folder. You can name it whatever you prefer. Within this folder, create the following files:
- index.html: index.html serves as the entry point of the game and hosts the HTML structure, including the canvas element where the game will be rendered.
- style.css: style.css is responsible for providing basic styling to the canvas surrounding.
- game.js: game.js contains all the business logic.
Once the project structure is ready open your preferred code editor and proceed with implementing the game functionality.
Adding the HTMLTo begin with, let’s add the following code to your HTML file index.html:
<!DOCTYPE html>
<html lang="en">
<head>
    <meta charset="UTF-8">
    <meta name="viewport" content="width=device-width, initial-scale=1.0">
    <link rel="stylesheet" href="/style.css">
    <title>Snake Game</title>
</head>
<body>
    <div id="score"></div>
    <canvas id="game"></canvas>
    <script defer src="/game.js"></script>
</body>
</html>
I assume you’ve at least a basic understanding of HTML and there is no need to explain each line of the code. The <body> element contains two functional components: <div id="score"> that will display the player’s score and <canvas id="game"> that represents the game grid for rendering graphics.
The <script> tag at the bottom of the <body> tag links the JavaScript file game.js and has a ‘defer’ attribute which ensures the script executes after the DOM is ready.
CSS allows us to prettify the visual appearance of the game surroundings, but in my Snake game implementation, it isn’t mandatory to add it, for this reason, you can skip this part. I use CSS here to style the document background and font with the following lines of code:
* {
    padding: 0;
    margin: 0;
}

body {
    background-color: #253227;
    text-align: center;
}

#score {
    font-family: serif;
    font-size: 3em;
    background: -webkit-linear-gradient(white, #67717f);
    -webkit-background-clip: text;
    background-clip: text;
    -webkit-text-fill-color: transparent;
}
In the JavaScript code snippet below, we define the settings object, which handles the connection with the canvas and score fields:
const settings = {
    canvas: document.getElementById('game'),
    context: function() {
        return this.canvas.getContext('2d');
    },
    score: document.getElementById('score'),
    cellCount: 10,
    cellSize: 50,
    frameRate: 10,
    cellColor: '#3f5543',
    cellColorAlt: '#3b4f3f',
    clearCanvas: function() {
        const ctx = this.context();
        ctx.clearRect(0, 0, this.canvas.width, this.canvas.height);
    },
    setCanvasSize: function() {
       this.canvas.width = this.cellCount * this.cellSize;
       this.canvas.height = this.cellCount * this.cellSize;
    },
    showScore: function(score) {
        this.score.innerHTML = score;
    },
    getRandomNumber: function() {
        return Math.floor(Math.random() * (this.cellCount));
    },
    drawBackground: function() {
        const ctx = this.context();

        for (let row = 0; row < this.cellCount; ++row) {
            for (let column = 0; column < this.cellCount; ++column) {
                ctx.fillStyle =  (row + column) % 2 === 0 ?
                                 this.cellColor :
                                 this.cellColorAlt;
                ctx.fillRect(
                    column * this.cellSize,
                    row * this.cellSize,
                    this.cellSize,
                    this.cellSize);
            }
        }
    }
};
The settings object includes properties such as canvas, score, cellCount, cellSize, frameRate, and methods like context(), clearCanvas(), setCanvasSize(), showScore(score), and drawBackground(). These properties and methods facilitate the manipulation of the game elements and provide functionality for rendering the canvas background. As you can see, the object structure is quiet self-descriptive, consequently, no need in redundant commentaries.
In this section, we'll focus on creating the snake object and related methods to initialize and manipulate its properties. The main idea about the snake's implementation is to adjust the sequence of blocks and move them in the defined direction.
To achieve this, we’re going to define our snake as an array of two-dimensional coordinates for the tail, along with properties for color, initial size, and position. Here's how we implement it:
const snake = {
    tail: [],
    color: '#4a78f0',
    initialSize: 3,
    setSnake: function() {
        this.tail = [];
        for (let i = 0; i < this.initialSize; i++)
        {
            this.tail.unshift(
            {
                x: Math.ceil(settings.cellCount / 5) + i,
                y: Math.floor(settings.cellCount / 2)
            });
        }
    }
};
Here we defined the properties as mentioned and the initialization of the setSnake() method. First, we clear the snake's body whether it contains data (by this we provide code reuse and we can use this method to restart the game) and fill it in with random points (x; y). With the unshift() method of Array instances, we add points at the start of the sequence because we want to have our snake's head with a [0] index. You can implement it using the push() method if you want. The snake's blocks initial position functions are added with the intention to approximately place it somewhere about the center of the canvas.
The snake's view is provided in a similar way we've already done for canvas cells by adding the drawSnake() method:
drawSnake: function() {
    const ctx = settings.context();
    ctx.fillStyle = this.color;

    this.tail.forEach(cell => {
        ctx.fillRect(
            cell.x * settings.cellSize,
            cell.y * settings.cellSize,
            settings.cellSize,
            settings.cellSize);
    });
}
To make the snake move, we need to update its position based on the chosen direction and handle keyboard input to control it. Specifically, we must change its head position to determine whether the next position contains food. Depending on this situation, we either add a new head with the coordinates of the consumed food or replace the last element of the tail with the current head position.
getNextPosition: function() {
    let head = {
        x: this.tail[0].x,
        y: this.tail[0].y
    };

    switch (this.direction) {
        case 'down':
            head.y++;
            break;
        case 'up':
            head.y--;
            break;
        case 'left':
            head.x--;
            break;
        case 'right':
            head.x++;
            break;
    }

    return head;
}

setNextPosition: function(point, cutTail) {
   this.tail.unshift(point);

   if (cutTail === true)
   {
       this.tail.pop();
   }
}
The getNextPosition() method calculates the next position of the snake's head based on its current direction using a switch statement. The setNextPosition() method updates the snake's position with a new head point and optionally cuts its tail to maintain the desired length.
Keyboard input is handled using the addEventListener() method to listen for keydown events. Based on the pressed arrow keys, the snake's direction is updated accordingly to ensure smooth movement without colliding with its own body.
window.addEventListener("keydown", (event) => {
    if (event.key === 'ArrowLeft' && snake.direction !== 'right') {
        snake.direction = 'left';
    } else if (event.key === 'ArrowUp' && snake.direction !== 'down') {
        snake.direction = 'up';
    } else if (event.key === 'ArrowRight' && snake.direction !== 'left') {
        snake.direction = 'right';
    } else if (event.key === 'ArrowDown' && snake.direction !== 'up') {
        snake.direction = "down";
    }
});
Since the snake is created, we need to feed it, therefore let’s create a food object:
const food = {
    position: {x: 0, y: 0},
    color: '#e7471d',
    setFood: function (excludedCells) {
        let result = {x: 0, y: 0};

        do {
            result.x = settings.getRandomNumber();
            result.y = settings.getRandomNumber();
        } while (collisions.isSnakePointCollision(result, excludedCells));

        this.position.x = result.x;
        this.position.y = result.y;
    },
    drawFood: function() {
        const ctx = settings.context();
        ctx.fillStyle = this.color;

        ctx.fillRect(
            food.position.x * settings.cellSize,
            food.position.y * settings.cellSize,
            settings.cellSize,
            settings.cellSize);
    }
};
Here, we've added the setFood() method with the excludedCells parameter, which is used to define forbidden cells for food generation. We also introduced the getRandomNumber() method to the settings object, encapsulating random number generation within the specified range [0, cellCount).
getRandomNumber: function() {
    return Math.floor(Math.random() * (this.cellCount));
}
Additionally, the drawFood() method is added to the food object to render it on the canvas, along with two properties: position, representing the current cell coordinates on the field, and color, indicating the color of the food cell.
Let’s create a new object called collisions and add the following code:
const collisions = {
    isSnakePointCollision: function(point, tail) {
        return tail.some(position => position.x === point.x &&
         position.y === point.y);
    },
    isOutOfField: function (point, cellCount) {
        return point.x >= cellCount ||
        point.y >= cellCount ||
        point.x < 0 ||
        point.y < 0;
    },
};
Within this object, the isSnakePointCollision(point, tail) method is designed to determine if a specific point (such as the snake’s head or food) already exists within the snake’s body. It iterates through the snake's tail and checks if any position matches the given point.
On the other hand, the isOutOfFieldmethod(point, cellCount) method serves the purpose of checking whether the snake's head has crossed the border of the game field. It evaluates whether the given point's coordinates exceed the dimensions of the game field, indicating that the snake has moved out of bounds.
The following code snippet handles the initialization of the game scene, including setting up the canvas background, snake, and food elements:
const game = {
    score: 0,
    isGameActive: false,
    init: function () {
        this.isGameActive = false;
        this.lastTimestamp = 0;
        this.score = 0;
        settings.showScore(this.score);
        settings.setCanvasSize();
        snake.setSnake();
        food.setFood(snake.tail);
        settings.clearCanvas();
        settings.drawBackground();
        snake.drawSnake();
        food.drawFood();
    }
};
While the placement of the initialization code at the end of the tutorial may seem unconventional, this approach excludes the necessity to change this object throughout the script development stages. At this stage our game is almost completed, so let’s proceed! To showcase our progress just add the next line of code at the bottom of the script game.init().
In this final section, we’ll implement the game loop to change the game state during time ticks. Let’s add the gameLoop() method to the game object:
gameLoop: function(timestamp) {
    if (!game.isGameActive) {
        return;
    }

    let elapsed = timestamp - this.lastTimestamp;

    if (elapsed > 1000 / settings.frameRate) {
        settings.clearCanvas()
        this.moveSnake();
        settings.drawBackground();
        snake.drawSnake();
        food.drawFood();
        this.lastTimestamp = timestamp;
    }

    requestAnimationFrame(() => game.gameLoop(performance.now()));
}
The gameLoop() method has one input parameter that represents the execution timestamp of the method. At the start of the method, we use the new property isGameActive to check whether the game is in progress, and therefore add this property to the game object this.lastTimestamp = 0.
The gameLoop() method utilizes requestAnimationFrame(), an optimized approach to schedule repaints of the browser’s page. This method replaces the old approach using setInterval(), which had performance issues. Additionally, we have the new moveSnake() method. It combines the snake object with others to make the snake move, check collisions, grow, or stop the game:
 moveSnake: function () {
    let head = snake.getNextPosition();

    if (collisions.isSnakePointCollision(head, snake.tail) ||
        collisions.isOutOfField(head, settings.cellCount))
    {
        this.init();
        return;
    }

    if (collisions.isSnakePointCollision(food.position, snake.tail))
    {
        let head = {...food.position};
        snake.setNextPosition(head, false);
        this.incrementScore();
        settings.showScore(this.score);
        food.setFood(snake.tail);
    } else {
        snake.setNextPosition(head, true);
    }
}
The incrementScore() method simply increments the score:
incrementScore: function() {
    this.score++;
}
The final touch is to activate the game when any key is pressed, add the following lines of code at the end of the addEventListener() handler:
if (!game.isGameActive) {
    game.isGameActive = true;
    requestAnimationFrame(() => game.gameLoop(performance.now()));
}
This condition allows us to activate the game upon pressing any key. You can designate a specific key for activation as per your preference.
ConclusionCongratulations!
You’ve created the Snake game from scratch. I hope you enjoyed my post and learned something useful for you. You might challenge yourself to improve the project with some extra features. Here are my suggestions on what can you add to make it harder:
- Food objects with different icons.
- Sound effects when the snake consumes food.
- Extra obstacles on the game field.
- Different speed modes.
- Separate visual element for the snake’s head.
- Snake animation on the game over event.
- Leaderboard.
- Visual menu to change game preferences.
- Smooth animation by pixels, but cells.
- Multiplayer.
- Invert the game process. You are a food object now and your objective is to walk away from the snake as long as you can. You should add one or more extra food objects to grow the snake with time.
Happy coding and see you in my next post!
Last updated: January 26, 2024